

Here is all the various parts of my Stowaway laid out and ready to be built up. The freshly stripped frame had recieved several coatings of black Hammerite, which when sprayed on is really nice stuff. I started with a thickly brushed on undercoating then after a light sanding sprayed over the top.
I had planned to retain the original handlebar stem but once the bike was together and test-rideable it was obvious that for the trekking bars to work the bike needed a much longer reach stem.So I got a long reach adjustable stem off ebay for £15.
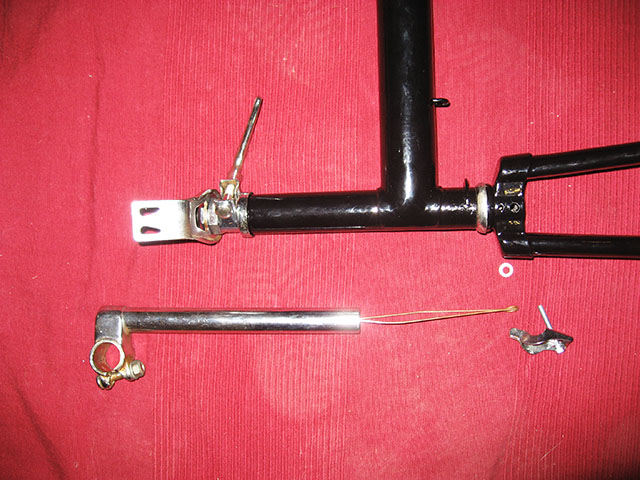
The Stowaway handlebar stem is a bit unsual because it doesn't have a normal headset. Instead there is a plastic bush at the top and a piece of looped wire which slides inside the stem. This bit of wire secures through the bolt for the from caliper brake. This means that when you are adjusting the quick release stem you can't accidentaly pull the stem out too far.

The finished wheels with tyres fitted. These Kenda tyres seemed like a good good choice (there isn't much choice with 451 tyres) but when it came to fitting them they have a ridiculously tight bead - not good news for any on the road punctures.

As with alot of vintage bike building the cotter pins for the cottered cranks where a bit worse for where. These things suffer on old bikes, mainly because they have old imperial threads and over the years someone will always have tried jamming on a metric nut. So both cotters got retreaded with metric threads and given brand new locking nuts.

mmmm shiny crisp new threads.
Here's a little video to show how easy it is.
During the build I stupidly managed to break the shifter for the Sach 5 speed hub by overtightening the nut. Its not a great design to be honest , since it relies on the plastic to take all the strain on the metal clip being wedged inside of it.


After deciding that there was no way to fix the original method of fixing I started to work out an alternative. So I took an old shimano friction shifter. Took out the handlebar attachment from that. chop some bits off it. Drilled a hole directly through the top of the sach shifter and glued/bolted the shimano base onto the sachs body.


The end result is slightly less elegant than before, but is actually more ergonomic as the whole shifter now sits a bit higher above the grips, meaning its easier to shifter with my thumb than it was before.

You can get long foam grips specially for butterfly bars, but I'm not keen on squishy foam, so instead got some honeycomb effect fake leather tape. Brown because the plan it to get a Brooks saddle of somesort, or a Charge Spoon at some point. With this build I used a gusset 1/2 link chain. I've never used a 1/2 linker before, but knowing how much bother it has been sometimes trying to get the chain tension just right on a hubbed bike (and then resorting to using a 1/2 link piece anyway) I decided this time it was worth trying. I'm a convert, 1/2 linkers are really easy to split & fit.

The rack is the original style Stowaway rack, but was a 24" wheel version new old stock. I had planned to just cut the stays down to 20" (so that the deck lays horizontal) but decided the extra heel clearance from it being slightly angled might be more useful.the front X-FD drum is as superb as expected, but the original cleaned up rear caliper is about as much use a chocolate firegaurd. I'll try it with some modern pads and see if i can get it any better.

The finished bike is very light and agile - as Stowaways usually as, but with the added fun of drum brakes, extra hand positions


