Showing posts with label stowaway. Show all posts

Tuesday, 5 July 2011

Stowaway Build


Here is all the various parts of my Stowaway laid out and ready to be built up. The freshly stripped frame had recieved several coatings of black Hammerite, which when sprayed on is really nice stuff. I started with a thickly brushed on undercoating then after a light sanding sprayed over the top.

I had planned to retain the original handlebar stem but once the bike was together and test-rideable it was obvious that for the trekking bars to work the bike needed a much longer reach stem.So I got a long reach adjustable stem off ebay for £15.
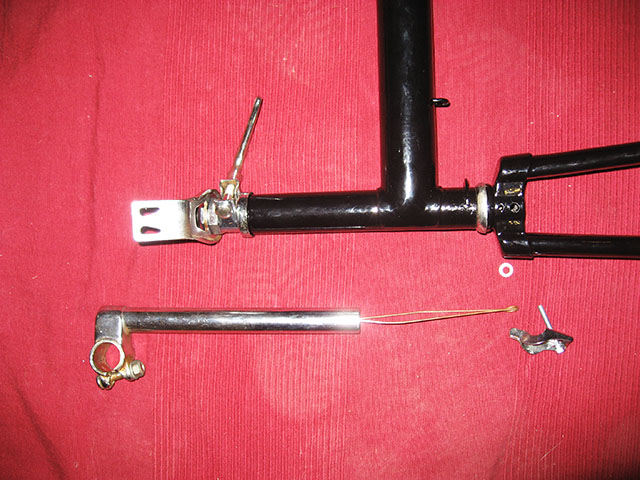

The Stowaway handlebar stem is a bit unsual because it doesn't have a normal headset. Instead there is a plastic bush at the top and a piece of looped wire which slides inside the stem. This bit of wire secures through the bolt for the from caliper brake. This means that when you are adjusting the quick release stem you can't accidentaly pull the stem out too far.


The finished wheels with tyres fitted. These Kenda tyres seemed like a good good choice (there isn't much choice with 451 tyres) but when it came to fitting them they have a ridiculously tight bead - not good news for any on the road punctures.


As with alot of vintage bike building the cotter pins for the cottered cranks where a bit worse for where. These things suffer on old bikes, mainly because they have old imperial threads and over the years someone will always have tried jamming on a metric nut. So both cotters got retreaded with metric threads and given brand new locking nuts.


mmmm shiny crisp new threads.

Here's a little video to show how easy it is.


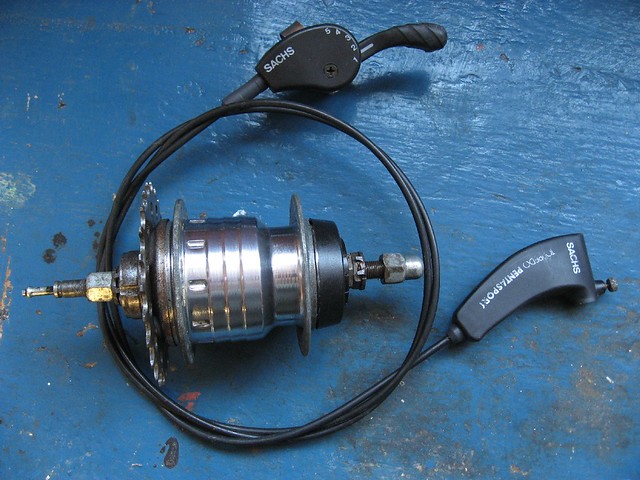
During the build I stupidly managed to break the shifter for the Sach 5 speed hub by overtightening the nut. Its not a great design to be honest , since it relies on the plastic to take all the strain on the metal clip being wedged inside of it.

After deciding that there was no way to fix the original method of fixing I started to work out an alternative. So I took an old shimano friction shifter. Took out the handlebar attachment from that. chop some bits off it. Drilled a hole directly through the top of the sach shifter and glued/bolted the shimano base onto the sachs body.


The end result is slightly less elegant than before, but is actually more ergonomic as the whole shifter now sits a bit higher above the grips, meaning its easier to shifter with my thumb than it was before.

You can get long foam grips specially for butterfly bars, but I'm not keen on squishy foam, so instead got some honeycomb effect fake leather tape. Brown because the plan it to get a Brooks saddle of somesort, or a Charge Spoon at some point. With this build I used a gusset 1/2 link chain. I've never used a 1/2 linker before, but knowing how much bother it has been sometimes trying to get the chain tension just right on a hubbed bike (and then resorting to using a 1/2 link piece anyway) I decided this time it was worth trying. I'm a convert, 1/2 linkers are really easy to split & fit.
The rack is the original style Stowaway rack, but was a 24" wheel version new old stock. I had planned to just cut the stays down to 20" (so that the deck lays horizontal) but decided the extra heel clearance from it being slightly angled might be more useful.the front X-FD drum is as superb as expected, but the original cleaned up rear caliper is about as much use a chocolate firegaurd. I'll try it with some modern pads and see if i can get it any better.

The finished bike is very light and agile - as Stowaways usually as, but with the added fun of drum brakes, extra hand positions

Tuesday, 19 April 2011

Brazing a brake-arm clip for an X-FD drum brake

Warning!: Ghetto, probably unwise, metal work below.

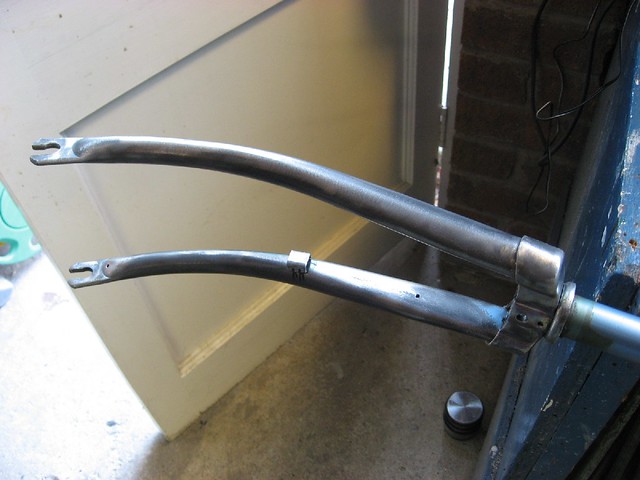
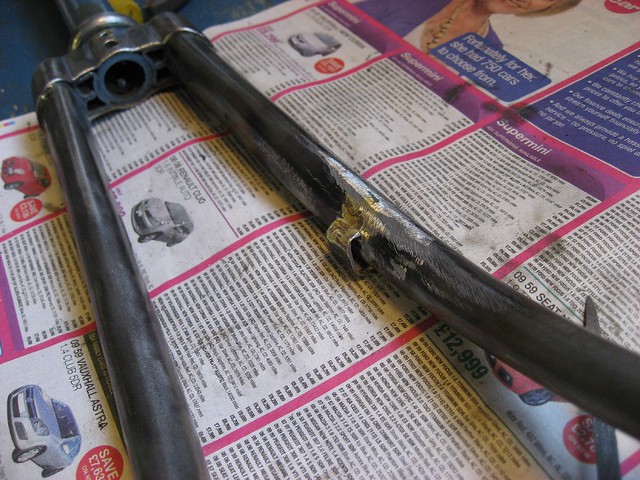
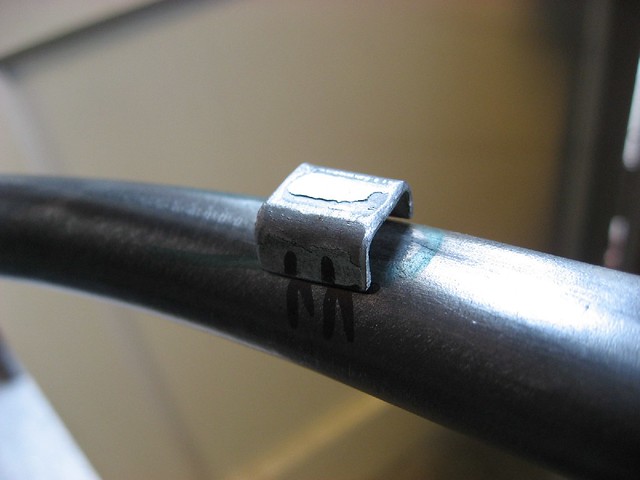
My Stowaway build includes a Sturmey Archer X-FD 70mm drum brake in the front wheel. Drum brakes have a long reaction arm which have to be secured to the fork in someway to provide a fixed point for the braking action to react against. This is usually done by using a clip-on fastening that is available in a variety of sizes, or the simplest way is to use a hoseclip (this is how my Sachs drum brake is attached to my Nexus bike). But since the Stowaway was stripped of paint anyway it made sense to install a permanent brake-arm clip on the fork. I'd already had my first go at welding with the Hopper, so this time it was a chance to have my first go at brazing.

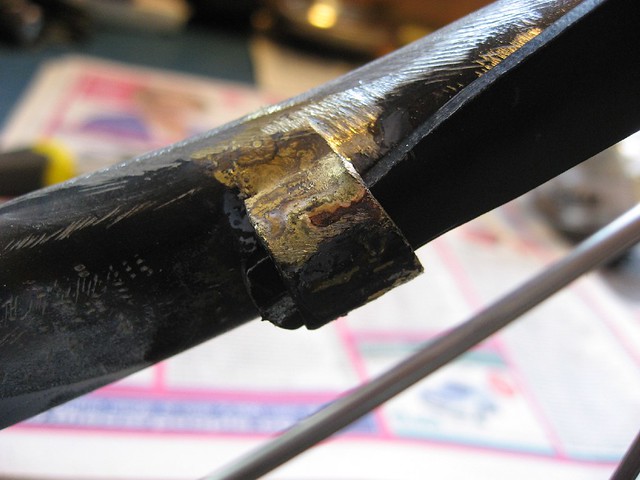
This is not exactly the high-quality methods that will be employed in full-scale bike building to say the least, but the end result is good enough for me in my garage. Kudos go again to my brother who showed me how to do this using a canister of Mapp gas (ment for plumbers fitting copper piping) with the nozzle tightened slightly to get a smaller flame. Still, by brazing standards the flame was big and ugly, heating up a much larger area than needed - which is why the braze spreads so far. In anycase, brazing is such a nicer process to do than welding, mainly because you can take your time and fuss less with awkward gloves & face masks.

Here's a quick run down & a video

A small tab, just the right size to fit the X-FD brake arm, made out of a piece of scrap bracket.
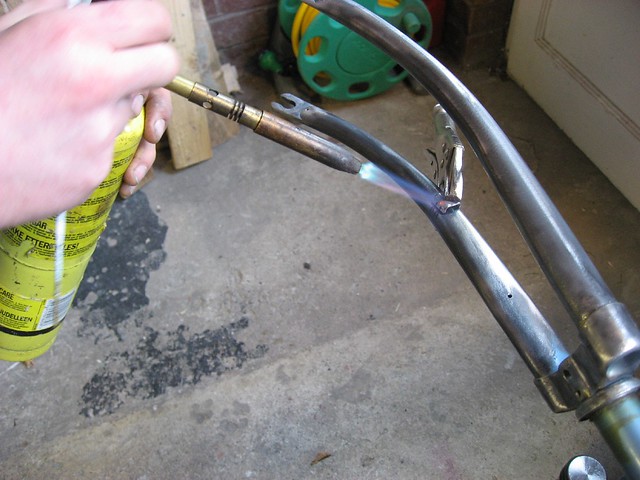
Start heating it up
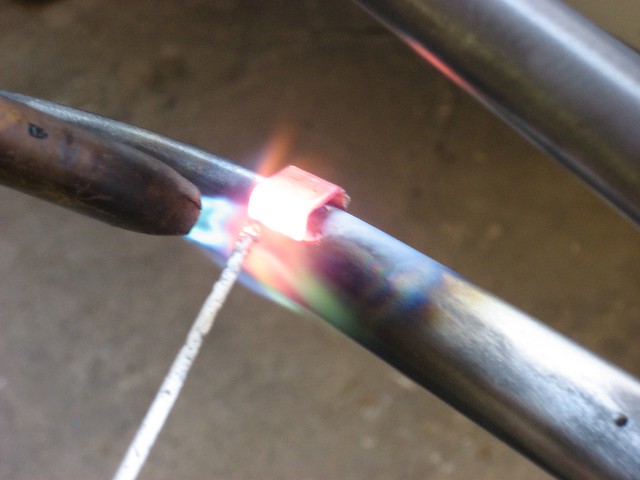
Beginning to melt the first bit of brass into the gap. Given up on the crappy mole grips by now, they kept falling off from the heat.


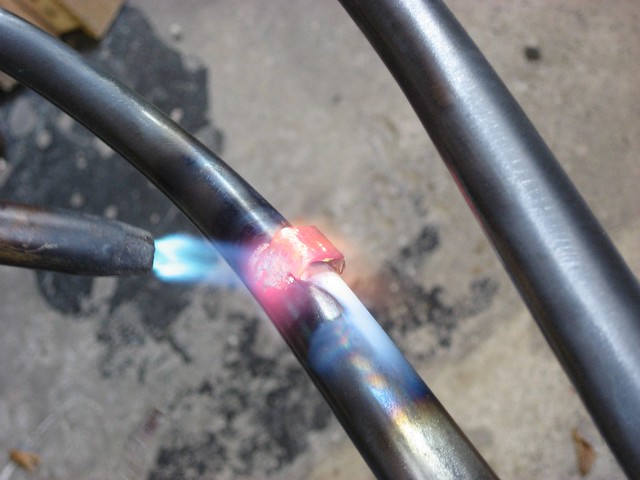
Decent amount of braze on there now
The brazed clip after a bit of filing
Fits nicely & when all painted up this is a much more elegant solution to securing the reaction arm than the alternatives.


Monday, 11 April 2011

Sachs 5 speed Torpedo Pentasport hub gear


This is a Sachs 5 speed Torpedo Pentasport hub gear - which is quite a mouthful of a name for a nice little german hub gear. This is the hub that will be going into my Stowaway build. It isn't stamped with a year and month as Sturmey Archer's handily are, so I can only guess at it's age. It is marked Sachs so precedes their taking over by Sram in 1997 and the 5 speed was introduced in 1987, so it's from sometime within that period.

It has got pretty respectable range of 251% which puts it a fair bit wider than a standard 3 speed (177%) and not too far away from my Shimano Nexus 8 (306%). The size of the steps between gears is also nice and even, with slightly shorter steps at either end of the range (1-2 & 4-5).

These Sachs/Sram hubs don't use a pull-chain that shorter range 3 speeds use, instead it has a 'clickbox' which clamps over the top of two push rods. The push rods are sleeved one inside of the other and when pushed in certain combinations will activate all 5 gears in sequence. It's this certain sequence that is dealt with inside the clickbox. The big advantage of this is that there is no adjustment to do, you just screw on the clickbox and hey-presto all 5 gears are selectable. The possible disadvantage of this is that the shifter, cable and clickbox come as a one piece unit. They are seperable, but each part is very specific and you can't for example just replace the cable as the cable is a solid wire with a special end fitting. You see most bike cables just have to pull, this cable has to push & pull. - which is a different kettle of fish. Basically if you need a new one, just go on ebay.de and buy the whole thing for a few euros.

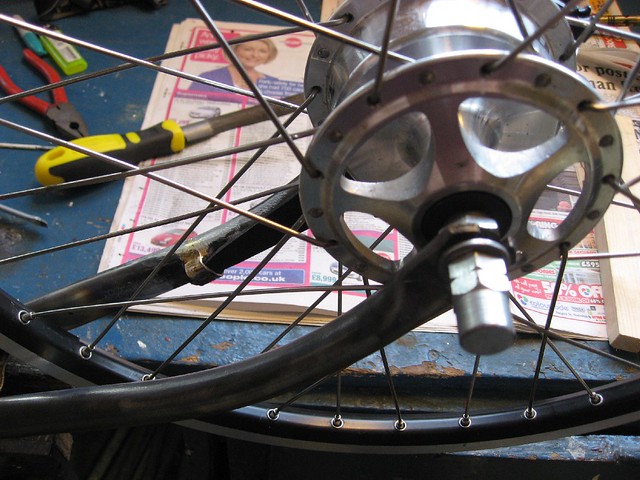
Another aspect to this hub is the metal cover plate on the drive side of the hub. It's quite large. Meaning that the hub can't accept very small sprockets such as 15/14/13 maybe also 16. I haven't tested further, but it should be ok with sprockets larger than this. You can see in the wheelbuilding photos below that I've put a 15 tooth on just to hold the plate on whilst I do the build and this doesnt have enough clearance. This would probably make the hub unsuitable for smaller wheels such as a Brompton as they need small rear sprockets to maintain.a sensible gear range. But on this bike with 451mm wheels a 46 tooth front ring and, for example, an 18 tooth rear would give gear inches of 32 to 81 - a nice range.

I did open up the clickbox on mine out of simple curiousity and it was a bit of a mixed bag, it was a good thing because I renewed the grease inside of it, but a bad thing because it is quite fiddly to put back together.


Above is a view of the inside of the clickbox with some new grease in there. There isn't anything to worry about with this though, the casing and components are very solid and it is very well sealed. I only opened mine to regrease it because this thing is a minimum of 14 years old.

I've had this hub for a while, having got it off ebay in the spur of the moment sometime last year. So when I started thinking about what to put in my Stowaway built this seemed the obvious choice. Before I started building it into a new 451mm wheel I opened it up for the first time just to check if it needed regreasing.


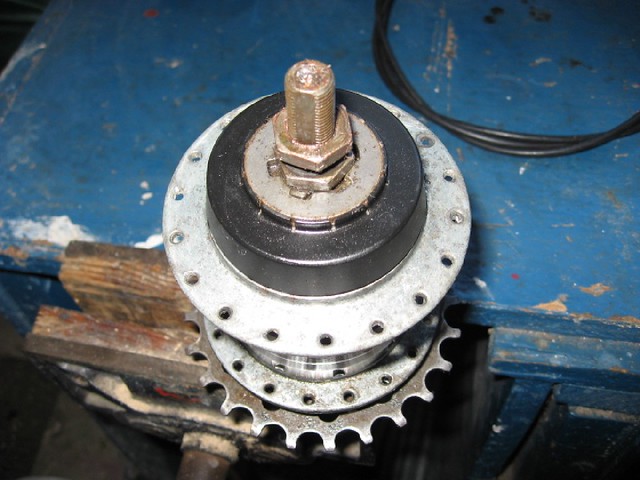
It's a very simple hub to open. Much simpler than for example the well known Sturmey AW 3 speed. All you have to do it undo the two nuts on the none drive side (shown above),....
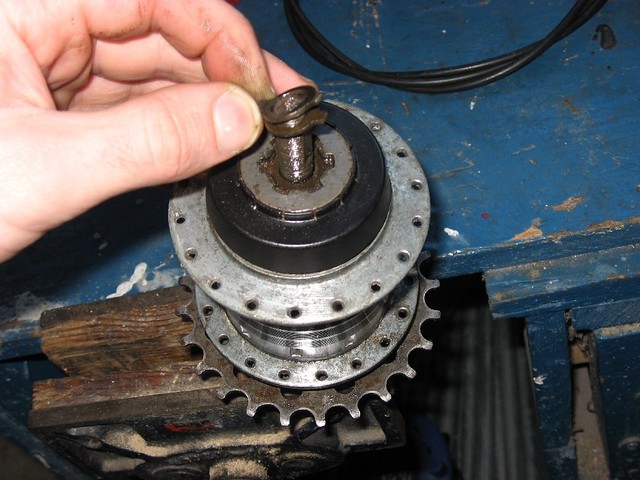
....then slide off the two retaining washer thingies.....

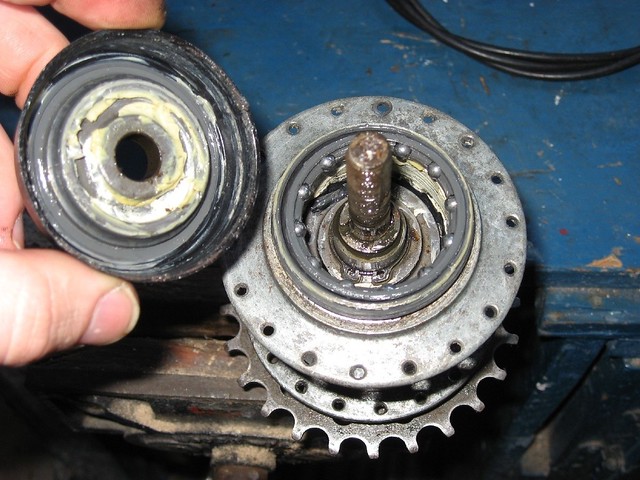
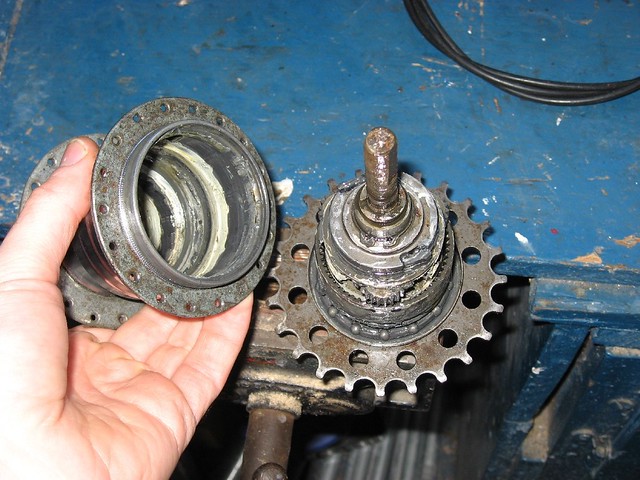
...and take off the big plastic dust cap. Once you have done that then the entire hub shell just lifts away from the internals - see below.


At first glance the inside of the hub doesn't look too delightful. but looking closer its actually very well greased up and doesnt require any attention. It has been regreased at somepoint by a previous owner using somekind of grey moly grease. Whatever it is, it is working just fine, so for the time being I'll leave it as it is. Below is the internals side by side with the shell.

With that done it's time to build it into the rim.
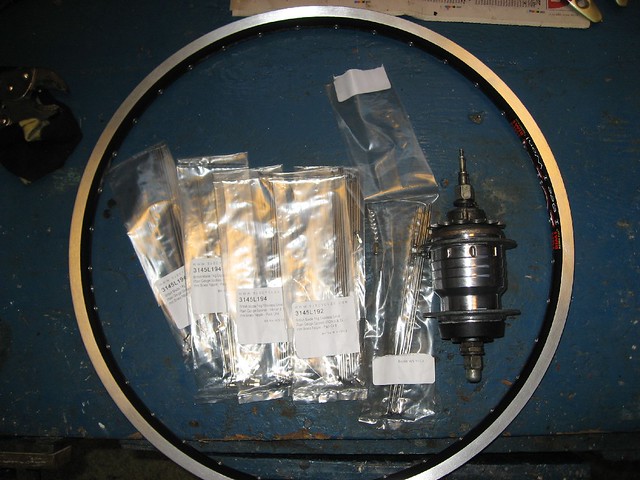
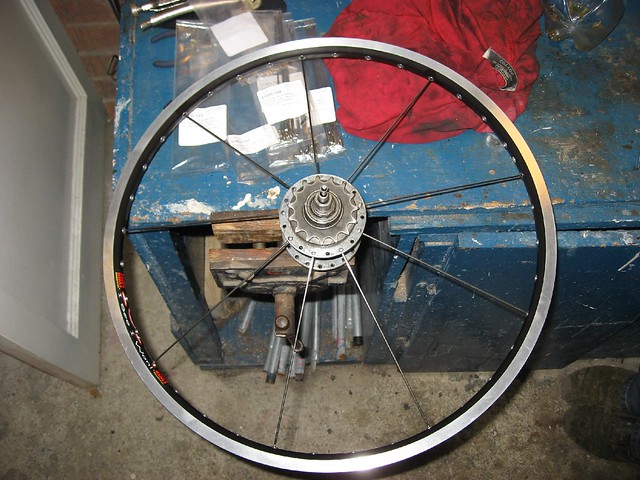
First of all the wheel needed a slight dish and fingers crossed this will all line up ok when the bike is built. Secondly the Damon Rinard spoke calculator Excel spreadsheet on Sheldon Brown's site came up with needing spokelengths of 198.5mm and 201.1mm for a 2 cross pattern. However I knew from building the Hopper that the calculator seems to overvalue the lengths by around 6mm. Maybe I'm using it wrong (I'm pretty sure I'm not), but I ordered lengths of 192mm and 194mm from SJSCycles and low and behold they were the perfect size. The rim is a Sun Ringle ICI-1 from Chainreactioncycles. They are very nice rims and the cheapest 451mm that it seems you can get with 36 spokeholes.


Starting off by loosely fitting a spoke from every other flange hole to every 4th hole along rim hole.

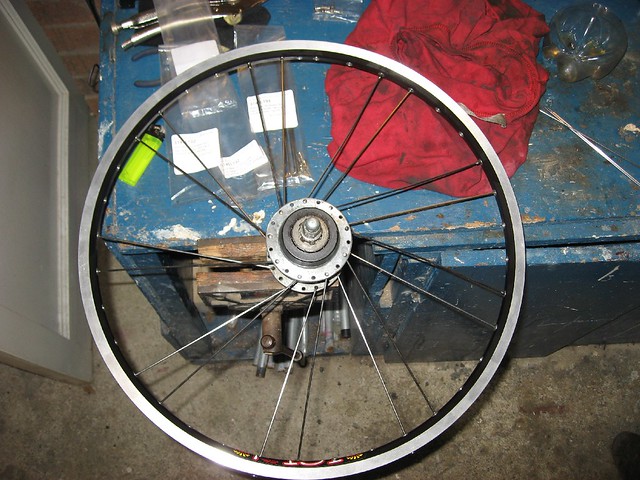
Then doing the same on the otherside
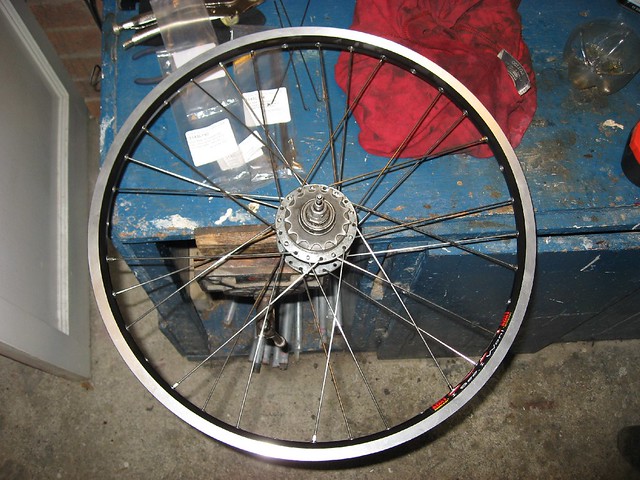
Now you start crossing the spokes by filling in the gaps on the hub flange with spokes coming in from the opposite side, crossing over the top of the next spoke and crossing under the spoke beyond that. That probably makes no sense, but there are much better wheelbuilding tutorials on the web than I can offer, besides the best way to understand it is to just build one and find out.
And repeat on the opposite side. Easy really. This is the first time I've built a wheel using brand new rims and I can tell you it is infinitely easier than using secondhand rims or existing ones from your bike. It simply laced up and was running tight and true without the slightest bother. (The Hopper wheels - built from well used BMX rims where the complete opposite and a real pain in comparison)


Wednesday, 23 March 2011

Stowaway - Stripping the frame

I spent some time at the weekend stripping the paint off this frame. It's a fairly simple task and is nice and easy with noisy power tools. This cheap angle grinder makes a serious racket, so its handy to wear a set of ear protectors as well as goggles. Some kind of eye protection if a must with things like this. Especially when the brush starts getting to the end of its useful life. You'll know when this is because it will start chucking bits of wire off every few seconds and do this to your hands:
Of course only morons carry on going when bits of hot sharp wire are cutting your hands....

If you want to strip some paint like this, then do not go to B&Q (the Halfrauds of diy)  because they charge £25 for the exact same cup brush that you can get on ebay for £2.50.
New set of spinny things


Here's the frame beforehand:


and a close up of the damaged headbadge and a bit of rust.

The Twenty and Stowaway do not have a standard style of headset. instead there is a large plastic bush at the top which allows the handlebar stem to be quick release adjustable. There is a wire inside of this attached to a bolt which prevents the stem from being pulled all the way out by accident. I didn't bother removing the bush, I was just careful not to ruin is when removing the paint in this area.
If you really wanted to go bonkers you can get the bare metal up to a brilliant shine, this is when you start wondering about a clear lacquer bike as used to be available from Brompton, but they seem to have stopped doing it for now.


The paint was already quite badly chipped and flaked. There was quite a contrast between the thickness of paint on this Raleigh frame and that on the Elswick Hopper Cosmopolitan. I'd guess that the Hopper's paint was at least twice as thick and as such took a bit more effort to remove than this paint did. When the paint is off you start to reveal some of the making of this bike, the odd splodge  & dribble of braze here and there. There was even a patch of braze on the top tube, presumably a slip up during manufacture that got filed back down flush (top left).


At the same time the various bits of chromework got a good cleanup and the pedals a service. I don't know if I'll keep the pedals, these old things weigh a ton, but theres no harm in servicing them anyway. Old pedals like this are pretty bullet proof. There isn't any bearings to wear out, they just have a solid axle straight through, so after a bit of a clean and a smear of grease they are back to their best.


After a couple of brew breaks to give your back a rest you end up with one complete Stowaway frame and mudgaurds minus horrible blue colour. I'm thinking of repainting it in solid black (black is cheap and I already have some) in the hope that it will come out looking something like this one.


Wednesday, 23 February 2011

Triumph Trafficmaster (Twenty Stowaway)

Back in October I got a couple of Raleigh Stowaways Triumph Trafficmasters. Neither were complete, but together they would make a single complete bike and another that could be stripped down and rebuilt in a new form. The seller I got them from has posted on the Raleigh Twenty forum in the past and has what can only be described as the greatest collection of folding bikes on the entire planet (or at least in England). 

These bikes are alot of fun to ride. They're fast and manouverable but still comfortable (apart from those crap saddles). The main difference in feel is probably the wheelbase. It's a few centimeters short of the wheelbase on a large wheeled bike which makes a difference for the cruising stability - or Longitudinal stability which in a nutshell probably means something like 'Does it go around corners?' & 'how easy is it to hold a straight line?'.

Oh yes and in typical Raliegh 3 speed fashion the gearing is too high, but really its based on the notion that if you need a lower gear to get up that hill then you should get off and push because then the gearing will be right for going fast down the otherside.
Both frames are a little scratched, but one of them is a bit more rusty than the other. So the least rusty bike got to live and recieved the missing bits it needed off the other bike, whilst the other poor bike found out that it could be reduced to the contents of a cardboard box ready for rebuilding. The plan so far is a hub geared/hub braked collapsible tourer with (if I can get some cheap) a set of butterfly bars.
Surviving original bike got to play out in the sun

Poor rusty bike didn't even fit in his temparary cardboard home
While we're at it here's a romatic shot of my brothers genuine Raleigh Stowaway with all of it's ever so slightly better features than mine, such as chromed mudgaurds and sheathed brake levers....oh and a mickey mouse bell.