Showing posts with label sturmey archer. Show all posts

Tuesday, 10 May 2011

Fixing stripped threads on a Sturmey X-FD axle


A while ago I bought a Sturmey Archer X-FD 70mm Front Drum brake hub off ebay. I got it a bit cheaper than one would normally go for because the threads on either end of the axle were damaged. Presumably from somebody forcing either the wrong nut onto the axle or over tightening a small domed nut - most likely the later.
The damaged section of threads did not extend too far, but did mean it was impossible to fit a nut or remove the ones still on the axle. The solution was to recut the damaged threads using a thread cutting set. Except it wasn't quite that easy because the Sturmey Archer axle appears to use an M9/1 thread. Needless to say our thread cutting set doesn't have a cutting bit for this size.


So instead the damaged threads got cut with a smaller M8/1 thread. This way they would still be the correct pitch, but at a smaller diameter, meaning the axle nut could screw over the damaged area and reach the undamaged threads further on.


The same technique could be applied to any valuable but damaged hub axle if needed.

Tuesday, 19 April 2011

Brazing a brake-arm clip for an X-FD drum brake

Warning!: Ghetto, probably unwise, metal work below.

My Stowaway build includes a Sturmey Archer X-FD 70mm drum brake in the front wheel. Drum brakes have a long reaction arm which have to be secured to the fork in someway to provide a fixed point for the braking action to react against. This is usually done by using a clip-on fastening that is available in a variety of sizes, or the simplest way is to use a hoseclip (this is how my Sachs drum brake is attached to my Nexus bike). But since the Stowaway was stripped of paint anyway it made sense to install a permanent brake-arm clip on the fork. I'd already had my first go at welding with the Hopper, so this time it was a chance to have my first go at brazing.

This is not exactly the high-quality methods that will be employed in full-scale bike building to say the least, but the end result is good enough for me in my garage. Kudos go again to my brother who showed me how to do this using a canister of Mapp gas (ment for plumbers fitting copper piping) with the nozzle tightened slightly to get a smaller flame. Still, by brazing standards the flame was big and ugly, heating up a much larger area than needed - which is why the braze spreads so far. In anycase, brazing is such a nicer process to do than welding, mainly because you can take your time and fuss less with awkward gloves & face masks.

Here's a quick run down & a video

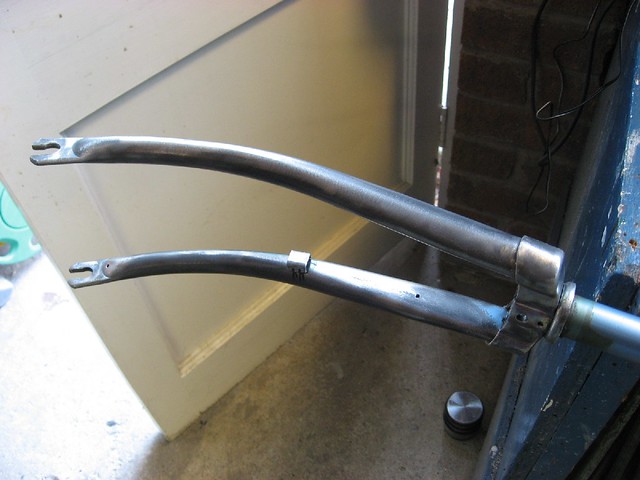
A small tab, just the right size to fit the X-FD brake arm, made out of a piece of scrap bracket.
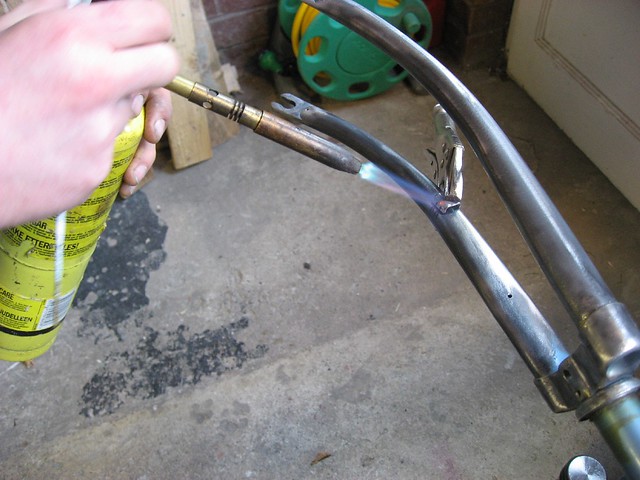
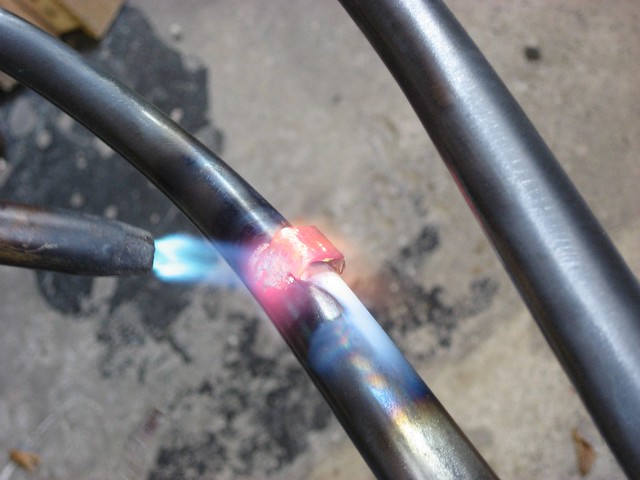
Start heating it up
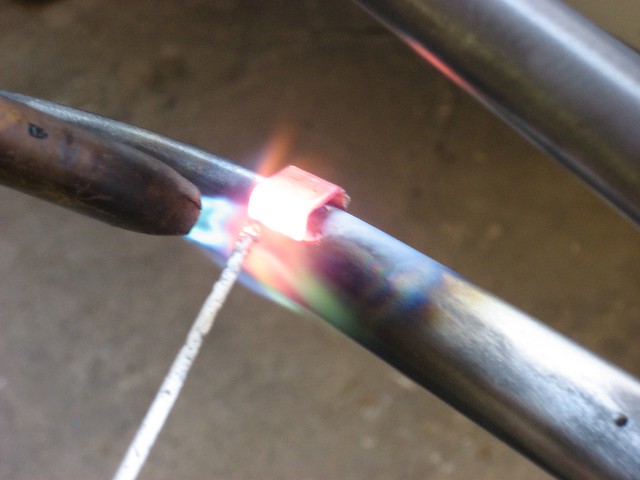
Beginning to melt the first bit of brass into the gap. Given up on the crappy mole grips by now, they kept falling off from the heat.


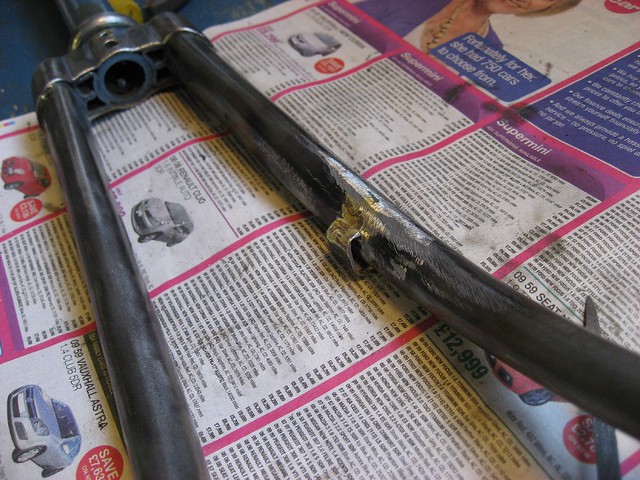
Decent amount of braze on there now
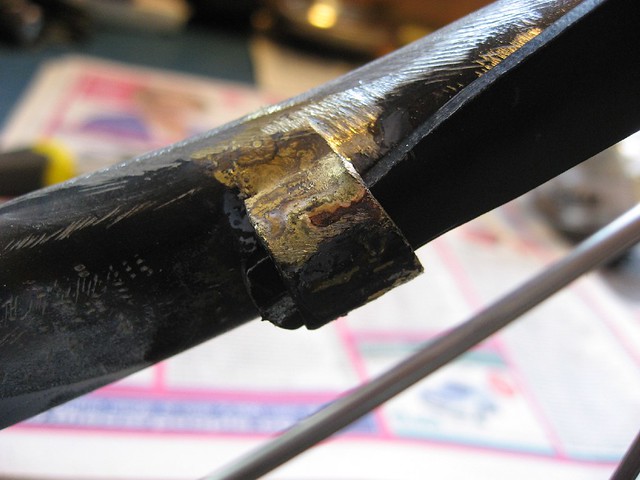
The brazed clip after a bit of filing
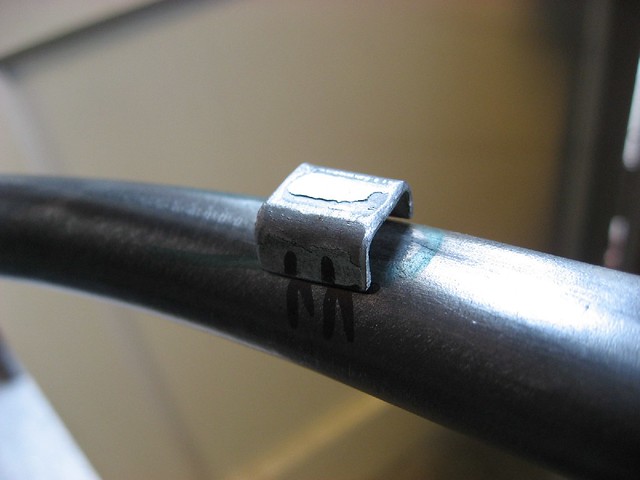
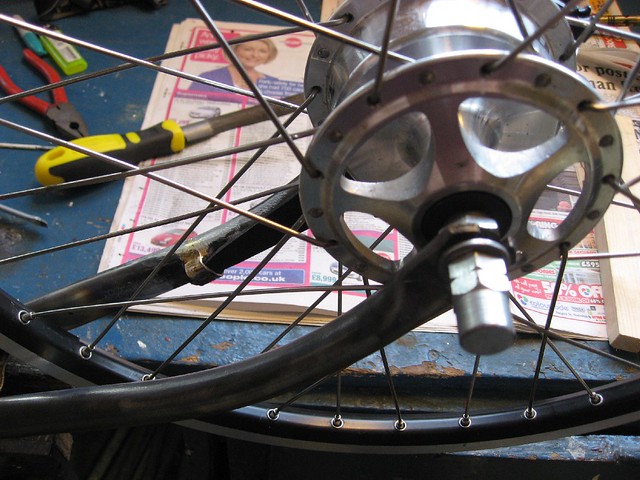
Fits nicely & when all painted up this is a much more elegant solution to securing the reaction arm than the alternatives.


Tuesday, 1 March 2011

I built this! - (Hopper Pt 8)


In my last post about the Hopper the bike was pretty much done and working, but I was having trouble with the back wheel. Not only did it destroy a pair of Sturmey lock washers it was also had a tendency to try and pull the back wheel over to one side and cause an unhappy marriage of tyre with chainstay. After a lot of trial and error me and my brother worked out a combination of:

  • Spreading the rear triangle a little
  • Dishing the wheel a bit more
  • Fitting SRAM lock washers
  • Using a ½ chain link
  • Removing the sprocket spacer on the hub so that the chain line was straighter.

I think this last point is the real deal breaker.  The Hopper’s Bottom bracket axle is quite short, whilst the new SAB steelite hub is a bit wider than a standard AW hub. This meant when the bike was rebuilt the chainline was way off. Even with all the changes it still isn’t track-bike-ishly straight, but its close enough to stop the wheel from wanting to cant off to one side when under a lot of torque. Which in turn led to having to overly tighten the axle nuts and end up crushing the lock washers. The half link in the chain allowed the wheel to sit further back in the dropouts and spreading the rear triangle a bit gave yet more room for error.

A little apprehensively, I rode it the 8 miles into work for the first time this morning and it all went smoothly. The X-FD & SAB brakes are fantastic – silent & powerful but very easy to modulate. The 46t-18t gearing on 20” bmx wheels is just right for cruising along at 12+mph in 3rd meaning the two lower gears are just right for setting off and going up the steep bits. I didn’t feel like I was spinning out on the down hills either – it’s a cruising bike not a racer. The rebuilt SAB hub ran smoothly and changed gear perfectly, so it’s new axle and a re-grease has done the job.

a round up of the components:
New: stem, saddle, X-FD hub, spokes, kickstand, cables, chain & tubes
Laying around the garage: handlebars, grips, pedals & sprocket
Secondhand off ebay: 90's SAB hub, BMX rims & tyres
Original: Frame + forks, chainring, cranks, mudgaurds, shifter & brake levers

Here’s a few shots of it finished (and more reliably working this time!). The Hammerite paint is looking good in a homemade kind of way. I've also bought a tin of gold enamel paint to do some pin-striping but cant make my mind up whether to do it or not yet.


The ride home was just as great, but the lumps and bumps of Manchester's roads will soon weedle out the weak areas. & I did subtitle this blog ' Making, Breaking and riding bikes in Manchester' so here's the bit that broke. The original mudgaurd hanger was probably the rustiest part on a very rusty bike, but also a fuss to replace. So I cleaned it up a little and painted it. However it got bent the other day and gave up on the way home. Luckily I had an emergency zip tie in my bag.


Thursday, 27 January 2011

Hopper build (pt 7)

It's been a pretty long time since my last post about the Hopper so here's an update.

All the various parts of bottom bracket, headset and cranks got a good soaking in turps and a rub with some wire wool.
The forks, frame and mudgaurds got sanded down with a combination of a cupbrush on an angle grinder and a dremel for the fiddly bits. No sand papering because thats boring. Then all the bits were given a good wipe down with meths to clear off any dirt as best as I could without actually putting much effort in :-).

In the past I've repainted a bike frame by going through the entire rigmoral of sanding it down, cleaning it up, applying undercoats, colour coats and then layer upon layer of laquer and you know what?....it's a complete waste of time and frankly the most boring process imaginable, plus the results are just not worth the effort to me.  So this time I decided to Keep It Simple Stupid and bought a tin of good ol'Hammerite. 


Then the entire lot was hung on a wire from the garage ceiling and given a liberal coating of dark green Hammerite. One thick coat is all it needs (ish) directly onto the bare metal, giving a tough shiny finish when you come back the next day which means it takes approximately 1 million less man-hours than spray painting and looks better in the end as well.
After that it was just a case of putting all the bits together, doing a bit of fiddling to get the chain tension right and the gears changing nicely then go for a test ride. (this is near the court in Ashton, just past a big gyratory of mortal peril)


The chain gaurd went on later (when I'd found it). The test ride exposed the rear mudgaurd as being rattly as hell, so the metal hanger for it got a piece of inner tube glued to the underside of it - which worked a treat.

Here it is in all its finished glory :-) its alot of fun to ride and actually has a very relaxed comfortable geometry. The drum brakes are amazing in the 20" wheels and just confirm to me that every bike I own from now on should have internal hub brakes where possible.
Unfortunately its out of action again now until I get round to replacing the lock washers for the rear hub. The ones I had weren't up to the task and have crumbled to pieces under presumably the torque of the drum brake and me standing on the pedals to test it out. Oops....


Monday, 22 November 2010

Dynohub (GH-6)


This is a Sturmey Archer GH-6 dynohub from 1956. It was rescued from a skip by my dad and although we really have no use for it, it’s nice to clean it up, take it apart and have a look.

It was in its original moss-ridden rod brake rim with a lot of broken spokes.
The bolt cutters made light work of those.

Before crud removal

After crud removal.

Dynohub logo.  The text ' Do not remove magnet without keeper' is a bit cryptic, it means dont seperate the magnet from the armature unless you have a big iron plug called a keeper. This maintains the magnetic field in the magnet. Best to just not seperate them.

Date stamp. (September 1956)

Removing the magnet fixing screws after undoing the locknuts (tiny little bolts and washers on these)


The magnet & armature removed. These should be kept together, if they are separated then the magnet will lose half of its power in an instant.

Inside the shell – filthy.

All cleaned up.


Back together and giving it a test. It works perfectly even after 54 years. I’m not planning on using it for anything as it’s basically redundant compared to modern dynamo hubs. But it’s a nice piece of historic kit and doesn’t deserve to be in the skip.

Monday, 27 September 2010

Hopper hubs (pt 4)


This is the hub that is going be laced into the rear wheel for the Hopper. It’s a Steelite SAB 3 speed Sturmey Archer with a 70mm drum brake from 1994. I got it for £8 posted. Why so cheap?, well it’s because the axle has snapped in two.  The rest of the components are fine (missing a few ball bearings though), so with a new axle fitted it should be a fully working 3 speed braked hub for roughly half the price that a fully working one would cost second hand off ebay and about a quarter of the price of a new SAB hub. Plus, in the process I get to have fun stripping it down and fixing it.

This is a greased hub rather than an oil lubricated hub. Apart from the changes related to lubrication (i.e. sealing/ball races) the most obvious difference between this hub and the AW that came fitted to the Hopper is the width of the 3 speed internal mechanism. With this hub the internals have been shrunk down a bit to accommodate the width of the drum brake without making the hub shell too wide.

The trickiest bit of opening up these hubs can be unscrewing the Ball Ring. This needs either a special Sturmey Archer 'C' Spanner or a hammer and punch to get it loosened up. Normally it should be fairly easy to undo with a couple of taps, but this one was very stuck. Probably a side effect of this being a powder coated hub. It took some serious welly from a hammer and chisel to get it free. I ziptied the brake to keep it locked in the hub so that I wouldn't damage the thin lip near the spoke flange when it was in the vice.


You can see from this photo that the hub shell is wider.


Whilst in this photo you can see the internals are more compact. These two aspects together provide the room for the drum brake.

These hubs are very easy to strip down and shouldn’t be intimidating to anyone who fancies having a go. I would do a write up of stripping a standard AW hub, but there is no point when I can just direct you to this youtube video which covers almost everything.

One thing to remember when playing with these hubs though is the pawl springs. They are tiny. If you aren’t careful you could tip up part of the internals, a pawl pin can drop out and the pawl spring will vanish from the face of the earth. So it’s a good idea to put an elastic band around the pawls whilst you are working, just in case.


Here’s the disassembled hub. You could strip it down more than this, right down to every single individual part but this is enough for me to get it fixed and re-greased.


The original axle is a HSA534. You can't buy these, so you could be forgiven for thinking this hub is not repairable. But the reason you can't buy them is they have been superceded by a better design. This better axle is the HSA571, which is available quite easily. On the old axle the Sun Pinion is a seperately machined piece which has been stamped permanently onto the axle - this creates an inherent weak point and is the reason this axle has somehow gotten snapped. The newer HSA571 axle is machined from a single piece, problem solved. In this photo I've removed the small circlip from the old axle, ready to put it on the new one - it holds the Planet Cage assembly in place.

I couldn't find out what grease you are supposed to use in these hubs, or anywhere obvious which sold the actual Sturmey Archer grease. So I got a tube of Shimano internal hub gear grease. If it works in more complicated 7/8 speed Nexus hubs then I figure it will work ok in a simple 3 speed. the hub was making all the right noises when it was greased and back together, so it should be fine.

Here is the hub all cleaned up and rebuilt with brand new outer parts such as wheel nuts, indicator chain, brake cable parts and brake arm clip. It's now all ready for lacing into a wheel and testing out. The front wheel will get a standard X-FD drum brake. Happy days :)

You can find the Technical spec in PDF form on Tony Hadland's excellent site, which is essential for finding out the parts numbers. As with all these things though, you can only learn so much by looking at the exploded diagram, best to take it to bits and find out for yourself.


Thursday, 9 September 2010

Hopper Wheels (pt 3)

Wheels and tyre sizes can be a bit of a nightmare. Personally from messing with bikes for a while, I know more than is healthy about the sizes that are available and what fits what. But it’s easy to forget that other people out there won’t have a clue that a 26” mountain bike wheel will be ISO 559 whilst that’s completely different from the 26” wheel on someone else’s Raleigh 3 speed. They are both called 26” but are not interchangeable at all. 

It’s the same scenario when it comes to BMX wheels. So it’s a potential mine field when you are trying to build up a wheel from scratch that doesn’t fit into the usual norms. This is compounded a bit when you want to try and save money wherever possible. For example when searching for suitable rims for the Hopper on ebay, almost every seller just describes their listing as a 20” rim without specifying whether it is ISO 406mm or 451mm & some can’t even be bother to tell you the number of spoke holes!. Equally, most of them won’t be much help when you email to ask what type of 20” wheel it actually is. It’s also a bit worrying when you email a seller who claims to be a DT swiss qualified wheelbuilder, but he thinks you’re speaking goobledigook when you ask what the Effective Rim Diameter is.

The much larger range of tyres available in 406 is the reason I decided to [reluctantly] abandon the Hopper's original size of 451 and I’ve now got a nice barely used set of Schwalbe Marathons in 406 x 1.75  and a pair of Sun Rhynolite rims ready & waiting. These will be matched up with a Sturmey Archer front drum brake hub, some short length spokes, a rear drum braked hub of some sort (probably 3 speed Sturmey Archer).

Here's the Tyres and rims:


God knows why the seller I got these rims from couldn't tell me for sure if they were 406 -- it says so on the sticker.... and the rim tape!. Anyway, they cost £13 for the pair and are just the right thing, so everyones happy.


In the meantime, just incase it'll help out with the wheel building and just because I’m sad enough to enjoy measuring silly things - I’ve added a vernier caliper to the tool collection.


Monday, 16 August 2010

Hopper Pt 2

Here's a few more photos of the Hopper being stripped. 

Scrape away some of the very thick grime to find the bike is much older than I was expecting.


Bottom bracket is nice and free running. The cotter on this crank came out easily, but was very seized on the drive side. Nothing a bit of liberal WD40 and mallet application won't solve though.

Here's the cranks after a bit of WD40 and a wire brush. Nice and shiny and ready to go back onto the bike when the time comes.

A sticker on the seatpost proudly tells me the frame is made from Pheonix 101 cycle tube. It'll be a shame to lose this sticker and the Elswick logo, I like them. If I can I'll try to mask over them and keep them as part of the new paint.


The mucky pedals cleaned up reasonably well whereas the grips are more 'cream' than white.
Some shots to show the chunky lugwork.
And finally the bare frame on its own.