Monday 25 July 2011

1930's Royal Sunbeam Light Roadster

This is a Ladies Royal Sunbeam from some point in the 1930's. When I got it a while ago the only thing I knew about it was that is is a Sunbeam. But after a bit of googling, and in particular finding this thread by another owner and this Sunbeam history page I began to piece together a rough history. Mine is almost identical to the one in the thread, which is identified as a Silver Sunbeam Light Roadster. But after looking at the 1936 Sunbeam brochure I'd have to disagree and say that it is a Ladies Royal Sunbeam Light Roadster as the Silver models all appear to lack the prestigious 'Little Oil Bath' chaingaurd.

Super comfortable 68/68 geometry with a long fork rake

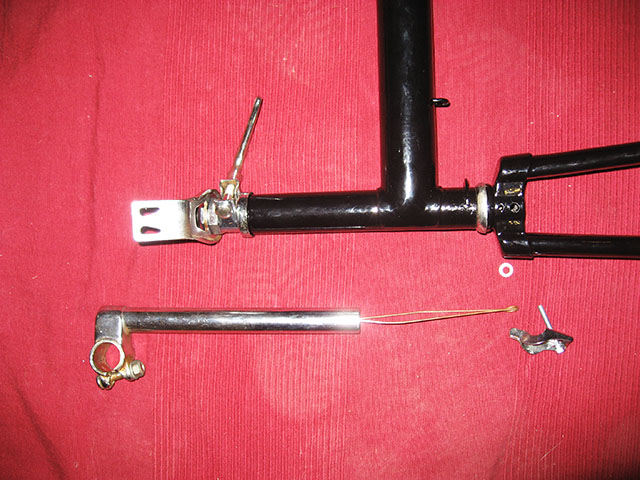
The original bike will have come with rod brakes, which have long since been removed and replaced  (probably in the 40's) with a set of Sturmey Archer 90mm drum brake hubs. The front hub is marked BF9, which denotes it is a BF model hub made in 1939. So it's fair to assume that the rear hub was fitted at the same time. The rear is an AB 3-speed 90mm drum brake hub and is so old it is undated, but will also most likely be from the 1930's.
The brake levers and shifter dont sit very comfortably on the rod brake handlebars
It's been through a fair bit of use and no doubt a fair number of owners in its 70+ years. When I got it the brakes where so ineffectual they might as well have not been connected at all but with some air in the tyres it was completely rideable, albeit you had to stop using your feet.
This is all that remains of the original markings
At somepoint, probably more than once, it has been given a coat of black paint to cover up various scratches etc. However this means that some original features such as the the transfers on the frame and chaingaurd are gone & there is a lot of overspill onto unpainted parts and the cables. The only transfer that is still there is the headbadge, but even that is mostly gone.
The oil ports are finely made spring loaded metal caps - quality stuff
Sunbeams were supposedly the finest bicycles money could buy in their day and this bike is certainly very well made. The main selling feature of these Sunbeams was the 'Little Oil bath' chaingaurd. Which was not any ordinary chaingaurd for 2 reasons -
  1. It is fully sealed and is supposed to have a small sump of oil at the front end, constantly bathing the chain in fresh oil.
  2. This bike only has one rear chain stay, the other is the chainguard itself which has a kind of miniature cellular beam inside it which carries the load of the bicycle & rider.
Image courtesy of www.localhistory.scit.wlv.ac.uk


I was unsure at first about what to do with this bike. Would it be historic blasphemy to strip it entirely & refurbish from scratch?. Invariably on tv programmes when something antique or vintage has been tampered with, cleaned up, repainted or heaven forbid...take out of the box! the expert will suck his teeth and declare that if is had been original (read : rusty and unuseable) then it would have been worth £50 quadzillion but since you took it out the box and used a bit of brasso on it is now worth £4.37. 

I know there is merit in this approach to total preservation, but to my mind this bike has had a sucession of owners all of whom have modified & maintained it in some manner. So since it belongs to me now, and it's already far from original, I intend to simply refurbish it as it stands and get this bike back to usefulness.
The problem with the brakes is most likely down to ancient cables, and glazed/dirty pads. So before I get to properly working on this bike I'll just clean up the brakes and oil the rear hub gear to get this bike rideable enough for the time being whilst it waits it's turn.
The mudgaurds stays have their own brazed mounts. One of them is badly  damaged but will be ok.


Bullnose front to the metal mudgaurd

The Sturmey shifter is still in working order, but has seen better days. I think it will clean up ok though. Older shifters like this have all their markings upside down. This shifter is a 1950's GC2 model which is supposed to be mounted on the lefthand underside. for some reason, possibly just fashion, all Sturmey shifters switched from underside mounting to topside in the 60's. This pdf is a comprehensive document on Sturmey shifters if you're into that sort of thing. The little circular window shows the different speed selected, there are no 1,2,3 speeds. It is L,N & H for Low, Neutral & High gears.

And to finish....adjustable dropouts.If only all my bikes had these....


Saturday 9 July 2011

Building a Dog Scooter

This is a crappy Asda BMX. What to do with it?. Let's make a dog scooter!.

Either read on or digest it all in a 1 minute video :)


After some brainstorming, the plan became to make some strategic cuts with the angle grinder to seperate the top half of the frame triangles away from the bottom half.
The top half could then be flipped upside down and the top tube welded to the bottom bracket.


A bit like this.


One potential problem with this approach would be the strain put onto the join that used to be the top of the seat tube. We solved this by welding a smaller diameter section of steel pipe inside and capping both ends with metal plate.
Once welded up we found out for the first time whether it would actually work. The frame had alot of bounce to it, but that's good as long as it's not too much. We knew that once the board supports and the plywood footboard were fitted they would add a bit more rigidity and the board itself would take flex somewhat in favour of the frame.
The board supports welded on. They are just box section steel.

The fitted board after a few coats of oil.
I had a can of purple spraypaint sitting around with no purpose (only bought it because it was £2 clearance). Even with the frame having virtually no preparation, the paint finish turned out really nice.
The finished scooter is alot of fun to mess about on. It's never going to be used as a proper dog sled, our dogs are neither big enough or trained for that, but it's certainly more use & fun than a broken Asda BMX :-)


Tuesday 5 July 2011

Stowaway Build


Here is all the various parts of my Stowaway laid out and ready to be built up. The freshly stripped frame had recieved several coatings of black Hammerite, which when sprayed on is really nice stuff. I started with a thickly brushed on undercoating then after a light sanding sprayed over the top.

I had planned to retain the original handlebar stem but once the bike was together and test-rideable it was obvious that for the trekking bars to work the bike needed a much longer reach stem.So I got a long reach adjustable stem off ebay for £15.


The Stowaway handlebar stem is a bit unsual because it doesn't have a normal headset. Instead there is a plastic bush at the top and a piece of looped wire which slides inside the stem. This bit of wire secures through the bolt for the from caliper brake. This means that when you are adjusting the quick release stem you can't accidentaly pull the stem out too far.


The finished wheels with tyres fitted. These Kenda tyres seemed like a good good choice (there isn't much choice with 451 tyres) but when it came to fitting them they have a ridiculously tight bead - not good news for any on the road punctures.


As with alot of vintage bike building the cotter pins for the cottered cranks where a bit worse for where. These things suffer on old bikes, mainly because they have old imperial threads and over the years someone will always have tried jamming on a metric nut. So both cotters got retreaded with metric threads and given brand new locking nuts.


mmmm shiny crisp new threads.

Here's a little video to show how easy it is.


During the build I stupidly managed to break the shifter for the Sach 5 speed hub by overtightening the nut. Its not a great design to be honest , since it relies on the plastic to take all the strain on the metal clip being wedged inside of it.

After deciding that there was no way to fix the original method of fixing I started to work out an alternative. So I took an old shimano friction shifter. Took out the handlebar attachment from that. chop some bits off it. Drilled a hole directly through the top of the sach shifter and glued/bolted the shimano base onto the sachs body.


The end result is slightly less elegant than before, but is actually more ergonomic as the whole shifter now sits a bit higher above the grips, meaning its easier to shifter with my thumb than it was before.

You can get long foam grips specially for butterfly bars, but I'm not keen on squishy foam, so instead got some honeycomb effect fake leather tape. Brown because the plan it to get a Brooks saddle of somesort, or a Charge Spoon at some point. With this build I used a gusset 1/2 link chain. I've never used a 1/2 linker before, but knowing how much bother it has been sometimes trying to get the chain tension just right on a hubbed bike (and then resorting to using a 1/2 link piece anyway) I decided this time it was worth trying. I'm a convert, 1/2 linkers are really easy to split & fit.
The rack is the original style Stowaway rack, but was a 24" wheel version new old stock. I had planned to just cut the stays down to 20" (so that the deck lays horizontal) but decided the extra heel clearance from it being slightly angled might be more useful.the front X-FD drum is as superb as expected, but the original cleaned up rear caliper is about as much use a chocolate firegaurd. I'll try it with some modern pads and see if i can get it any better.

The finished bike is very light and agile - as Stowaways usually as, but with the added fun of drum brakes, extra hand positions

Friday 1 July 2011

What lies beneath

A while ago I posted about how occasionally you see glimpses of what lies beneath the thin skim of tarmac on most of Britains urban roads. For the last few weeks some workmen have been working in a huge hole beside the Apollo and now they are finished they have skimmed back a huge section of the existing tarmac inorder to replace it.


This is the end of Hyde road and these setts will stretch the entire distance all the way back to Hyde and in most directions beyond. The tram lines however are probably quite rare as the wiki page for Manchester Tramways says nearly 5000 tons of track was ripped up and donated to the war effort.


Just a couple of inches down is the preserved cobble setts and the tram lines. Whilst they were digging the hole you could even see below these cobbles was a huge set of iron girders which helped support the weight of the trams down the centre of the road.


You can see here the lines diverging off in in seperate directions ready for the junction ahead. this morning they were using a huge street cleaning lorry to clean up the loose bits ready to re-tarmac, by tomorrow it will probably be all neatly covered back up. Lots more to read about Manchester Corporation Tramways which ran the 292 miles of track around Manchester.